


ADV Bum
-
Content Count
3734 -
Joined
-
Last visited
-
Days Won
1
Posts posted by ADV Bum
-
-
Forest Trail and Road Closures
Forest and road closures change frequently depending on the fire hazard level, weather, and various other unforeseen elements. This page is updated as changes occur. Weekend updates will be posted the Friday before. For other condition information, or questions regarding reopening expectations, Please contact the proper Ranger District.
DUE TO EXCESSIVE HEAT AND RED FLAG WARNINGS, ALL NON PAVED ROADS ON THE TRABUCO RANGER DISTRICT WILL BE CLOSED.
- Last updated: September 4th, 2020
Road/Trail Name District/County Status Comments Bedford Road (4S03) Trabuco/Riverside County Closed Subject to closure based on wet weather or fire danger. Black Mountain Road (11S04) Palomar Ranger District Closed Subject to closure based on wet weather or fire danger. Black Star Trabuco Ranger District Partially Open Open to hiking and biking only. Deer Park Road (14S04) Descanso/San Diego County Closed Closed due to unsafe road conditions per Forest Order No. 02-20-8 map Fred Canyon Road (16S08) Descanso/San Diego County Closed Subject to closure based on weather or fire danger. Harding Truck Trail (5S08) Trabuco/Orange County Partially Open
Open to hiking and biking only. Highpoint Road (8S05) Palomar Ranger District Closed Subject to closure based on wet weather or fire danger. Indian Truck Trail (5S01) Trabuco/Riverside County Closed Closed indefinitely due to the Holy Fire. Kitchen Creek Road (15S17) Descanso/San Diego County Partially OpenSubject to closure based on weather or fire danger. La Posta Road (15S05) Descanso/San Diego County Closed Subject to closure based on weather or fire danger Lusardi Truck Trail (11S03) Palomar Ranger District Closed Subject to closure based on wet weather or fire danger Maple Springs Road (5S04) Trabuco/Orange County Closed Subject to closure based on wet weather or fire danger. North Main Divide (3S04) Trabuco Ranger District Closed Subject to closure based on wet weather or fire danger. Orosco Ridge Road (12S02) Palomar Ranger District Closed Subject to closure based on wet weather or fire danger
Palomar Divide Road (9S07) Palomar Ranger District Clsoed Subject to closure based on wet weather or fire danger. Pine Creek Road (14S05) Descanso/San Diego County Upper Closed/ Lower Closed Subject to closure based on weather or fire danger. Pine Mountain Road (14S02) Descanso/San Diego County Closed Closed due to unsafe road conditions per Forest Order No. 02-20-8 Sheephead Mountain Road (15S18) Descanso/San Diego County Closed Subject to closure based on weather or fire danger. Skye Valley Rd. (17S06)***Located within Corral Canyon OHV Area***Descanso/San Diego County Open Subject to closure based on weather or fire danger.Skyline Trabuco Ranger District Closed Closed to all use due to COVID19 as per Riverisde County. South Main Divide (6S07) Trabuco Ranger District Open Subject to closure based on weather or fire danger. Thing Valley (15S08) Descanso/San Diego County Open Subject to closure based on weather or fire danger. Trabuco Canyon Road (6S13) Trabuco Ranger District Closed Closed indefinitely due to the Holy Fire. Upper Santa Ysabel East (12S07) Palomar/San Diego County Closed Subject to closure based on wet weather or fire danger. Upper Santa Ysabel West (12S07) Palomar/San Diego County Closed Subject to closure based on wet weather or fire danger. Westside Truck Trail (13S10) Palomar/San Diego County Closed No motorized vehicle access Wildomar Road/Cleveland Forest Road (7S04) Trabuco Ranger District Open Subject to closure based on weather or fire danger. Wooded Hill Rd (15S10) Descanso/San Diego County Open OHV Trail District/County Status Comments Bear Valley OHV Descanso/San Diego County Open Subject to closure based on weather or fire danger.Descanso/San Diego CountyOpen Subject to closure based on weather or fire danger.
Includes Skye Valley Road (17S06)Wildomar OHV Trabuco Ranger District Open Subject to closure based on weather or fire danger. -
Sounds like they will be taking some miles away from public/ ds roads.
-
-
How To Bleed Brakes On A Dirt Bike
A way to ensure your brakes perform optimally.
By Paul OlesenJune 10, 2019Chances are if you ride dirt bikes or operate any other wheeled powersports machine, you will eventually have to bleed your brakes. Brake bleeding in itself is not a difficult job, but there are a handful of tips and tricks that can make the process go more smoothly and result in better-performing brakes.
 Bleeding brakes is not only necessary when there’s air in the line, it’s also a normal maintenance task that should be performed periodically.Courtesy of ProX
Servicing brake systems by replacing worn components as needed and refreshing the brake fluid periodically is a critical maintenance task that is often overlooked. In this article, we’ll provide an overview of the brake bleeding process and share some tips that can make the job easier. We’ll even provide a few pointers that can make rebuilding your master cylinder go more smoothly.
 If you’re feeling sponginess in the lever or less braking power, be sure to check your brake lines and banjo bolts for damage and leaks.Courtesy of ProX
The necessity to bleed your brakes may crop up for several reasons. The telltale signs that your brakes may need to be bled are reduced braking power, inconsistent braking, and sponginess felt in the lever. If any of these symptoms exist, it is always a good idea to check the integrity of the system. Leaks can occur as a result of loose banjo bolts, damaged seals, and cracked lines.
ADVERTISEMENTTo start, it is always a good idea to consult your make and model’s factory service manual for information specific to the task at hand. Within your service manual, you’ll find torque specs, detailed procedures, and fluid information that can be important to take into consideration when performing the job.
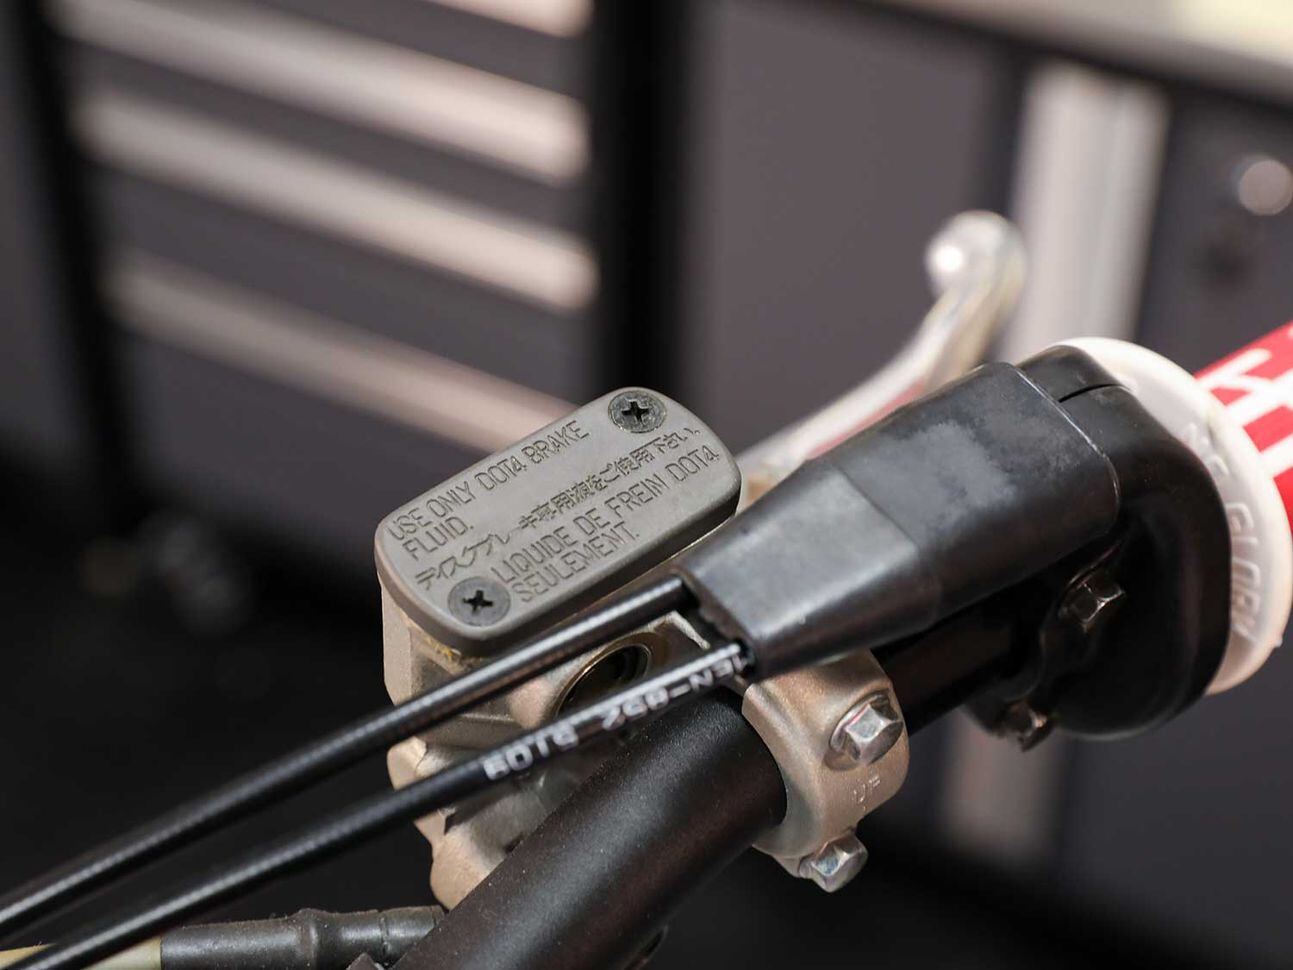 The correct type of brake fluid for your motorcycle should be noted both in your owner’s manual and on the master cylinder cap. Do not use anything other than the recommended type.Courtesy of ProX
Brake fluids used in automotive and powersports applications within the United States and many other parts of the world are divided into three classes. Specifications for the classes are outlined by the Department of Transportation (DOT). The commonly available fluid class options are DOT 3, DOT 4, and DOT 5.1. The majority of powersports applications utilize DOT 4 brake fluid. Usually, your bike’s brake fluid reservoir cover/cap on the front and rear master cylinder denotes which fluid is used. In general, mixing of brake fluid classes is not recommended because of compatibility reasons and differences in boiling points.
 Brake fluid is a very harsh chemical; be sure to protect yourself and your bike.Courtesy of ProX
Unfortunately, brake fluid is a harsh chemical and should be treated as such. Both you and your motorcycle can be adversely affected by inadvertent contact with brake fluid. When servicing your brakes and bleeding your lines, be sure to take any necessary precautions and avoid skin and eye contact. Wear rubber gloves and safety glasses when bleeding the brakes. If the brake lever is pumped too quickly during the bleeding process, fluid can be shot into the air from the reservoir. Brake fluid can strip paint and cloud plastics, so be sure to protect your bike’s surfaces with a towel or rags to limit exposure.
ADVERTISEMENT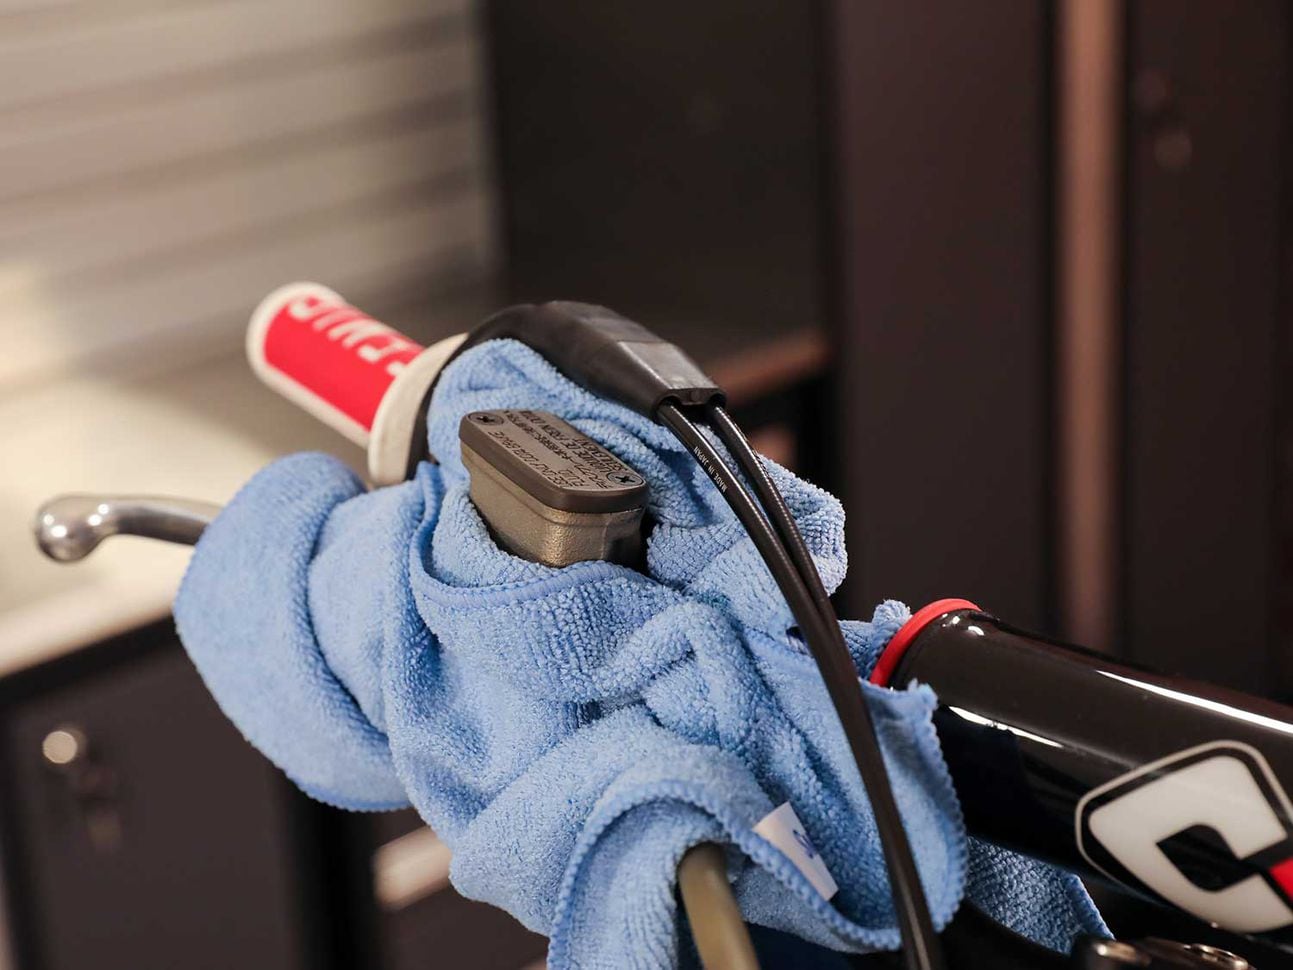 Make sure your master cylinder is as level as possible to avoid spilling fluid. Wrap a towel or rag around the master cylinder in case of an accident.Courtesy of ProX
Prepare to bleed your brakes by positioning the front or rear master cylinder and reservoir as close to level as possible. When working on the front brake, this often means turning the handlebar to one side or the other to achieve a level reservoir. Don’t forget to position towels or rags around the reservoir in case of a spill.
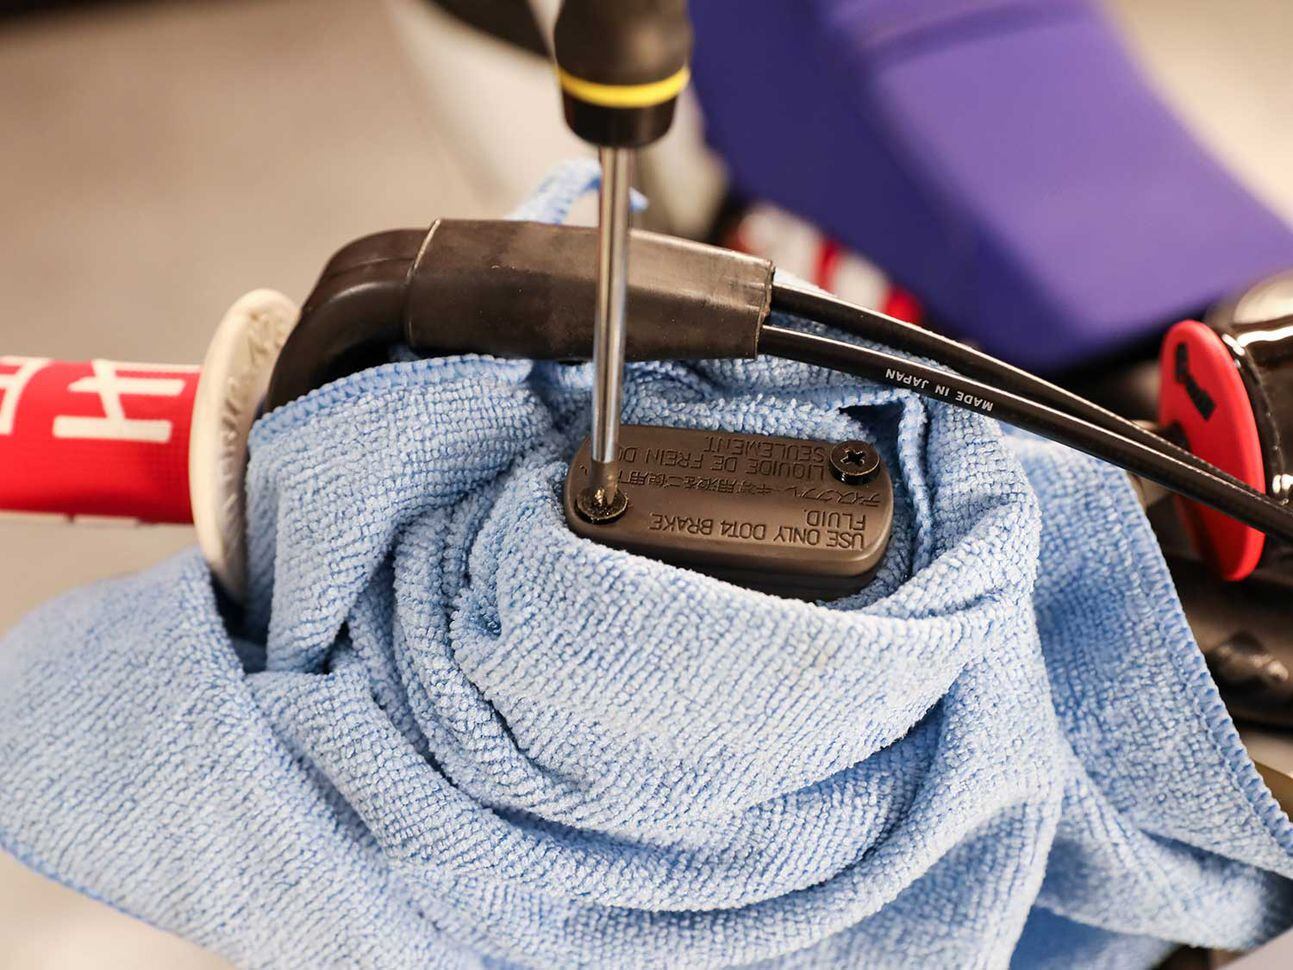 Be sure to use the correct tool(s) to remove the master cylinder cap to avoid stripping bolts.Courtesy of ProX
Once situated, remove the reservoir cover or cap, depending on which system you’re working on. Reservoir cover screws can be prone to stripping, so proceed cautiously. Typically, flat-head Japanese Industrial Standard (JIS) screws are used on Japanese equipment. While a Phillips bit is close in profile, it is not the right bit for the job and will more easily strip the fastener. Pick up a set of JIS screwdrivers or bits; otherwise, the tip of a Phillips bit can be ground down in a pinch so that the bit fits the JIS profile more closely.
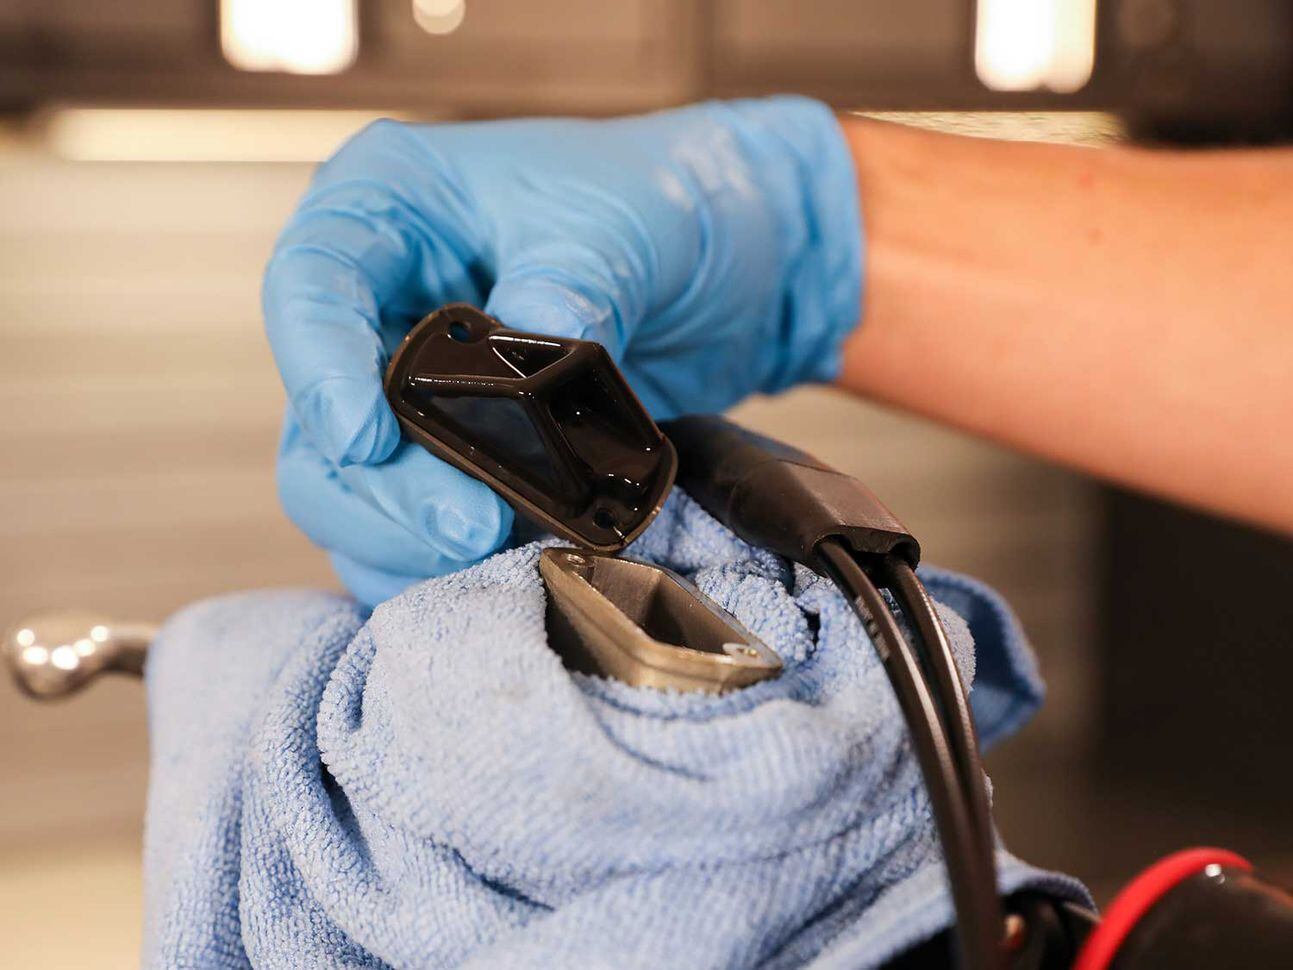 After the cover or cap has been removed, proceed to remove the diaphragm. The diaphragm may come off with the cap, so be careful not to drop or damage it.Courtesy of ProX
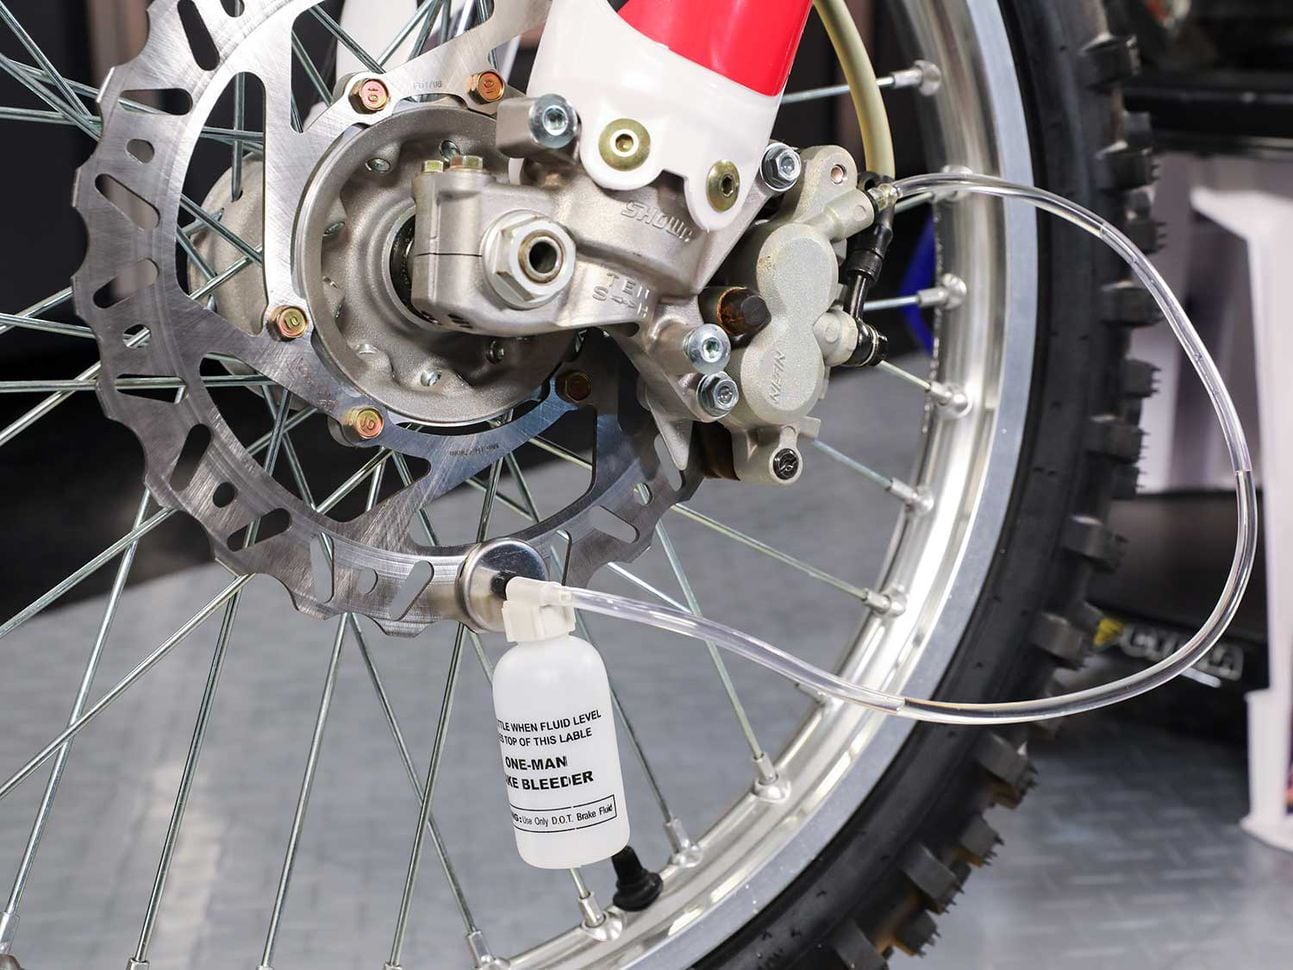
Transition to the caliper and remove any necessary covers or guards so that the bleeder valve is visible. The bleeder valve has a rubber cover that protects its flared nipple and should be easily identifiable. Size a clear piece of tubing so that it fits snugly over the bleeder valve nipple and has at least 6 inches of length, or enough length to drain into a catch bottle.
ADVERTISEMENT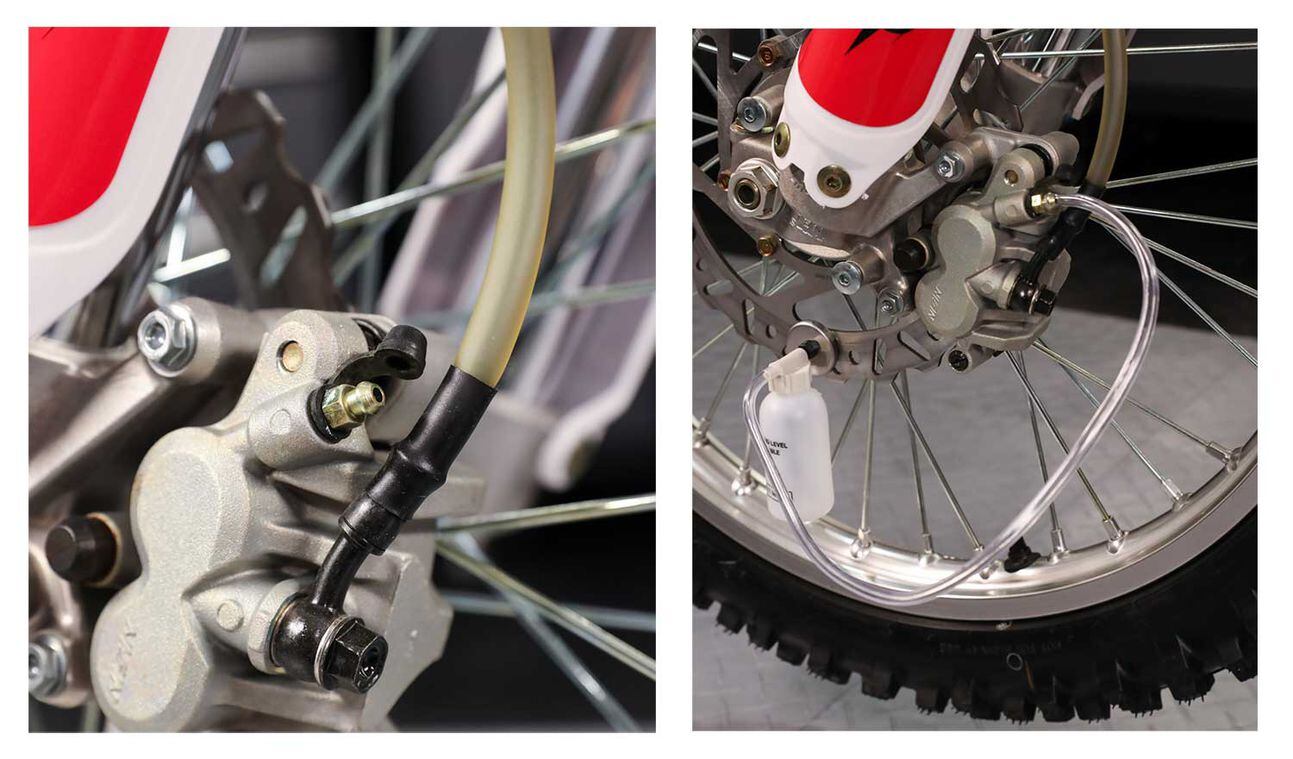 Remove the protective rubber cap from the bleeder valve and place a piece of clear plastic tubing over it. Make sure the plastic tubing is snug and completely covering the flared end. The other end of the tubing should be placed into a catch bottle.Courtesy of ProX
To begin the bleeding process, squeeze the brake lever (front) or push the pedal down (rear), then open the bleed valve a quarter to a half turn. A mixture of air and brake fluid should exit from the bleeder valve and be visible in the clear tube. Close the bleed valve. Next, slowly release the brake lever or pedal and allow it to remain at its original extended position for a few seconds before repeating the process.
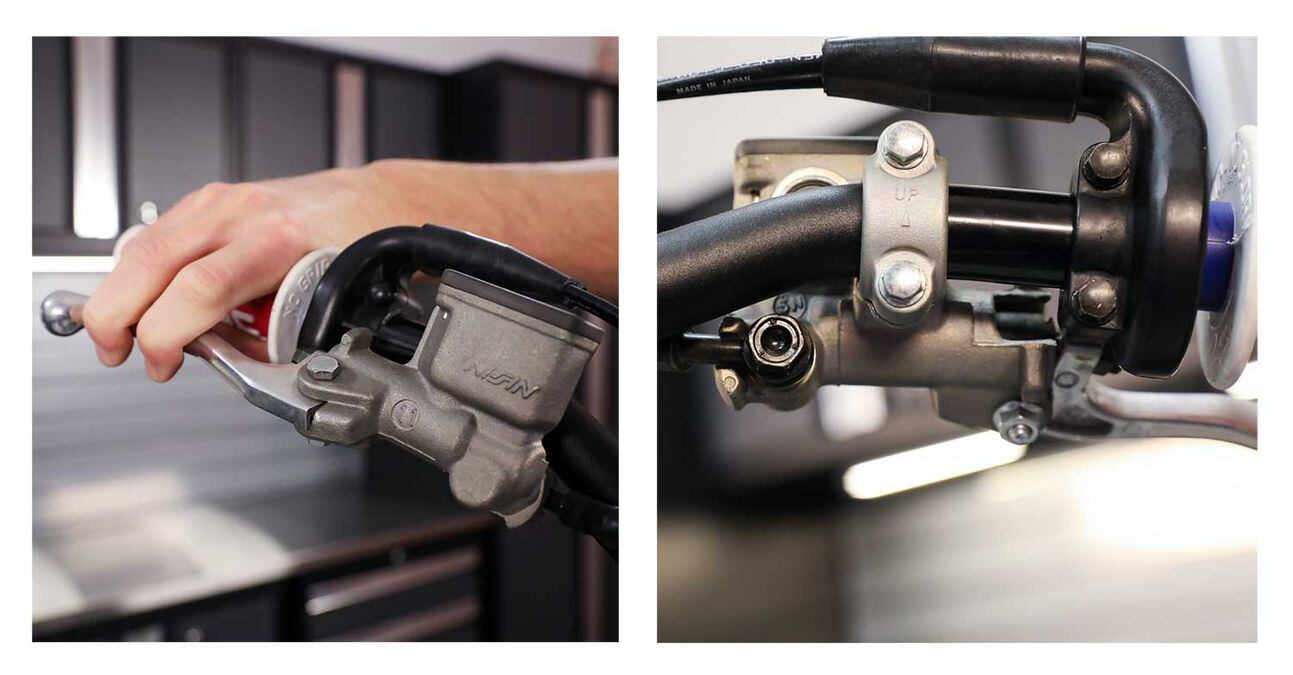
 Squeeze the brake lever (front), then loosen the bleeder valve approximately a quarter turn. Once the lever compresses all the way in to the grip, close the bleed valve, then release the lever. Repeat this process as necessary to work fluid and air out of the system.Courtesy of ProX
Keep a close eye on fluid levels in the reservoir. If all the fluid in the reservoir is consumed and air is sucked in, the whole process will need to be restarted. Add fresh brake fluid to the reservoir as necessary throughout the bleeding process to ensure no air ever gets sucked into the system. When adding brake fluid, be very careful to ensure no contaminants such as dust or debris enter the reservoir. Any small particles that find their way into the brake system can cause the system to malfunction or prematurely wear.
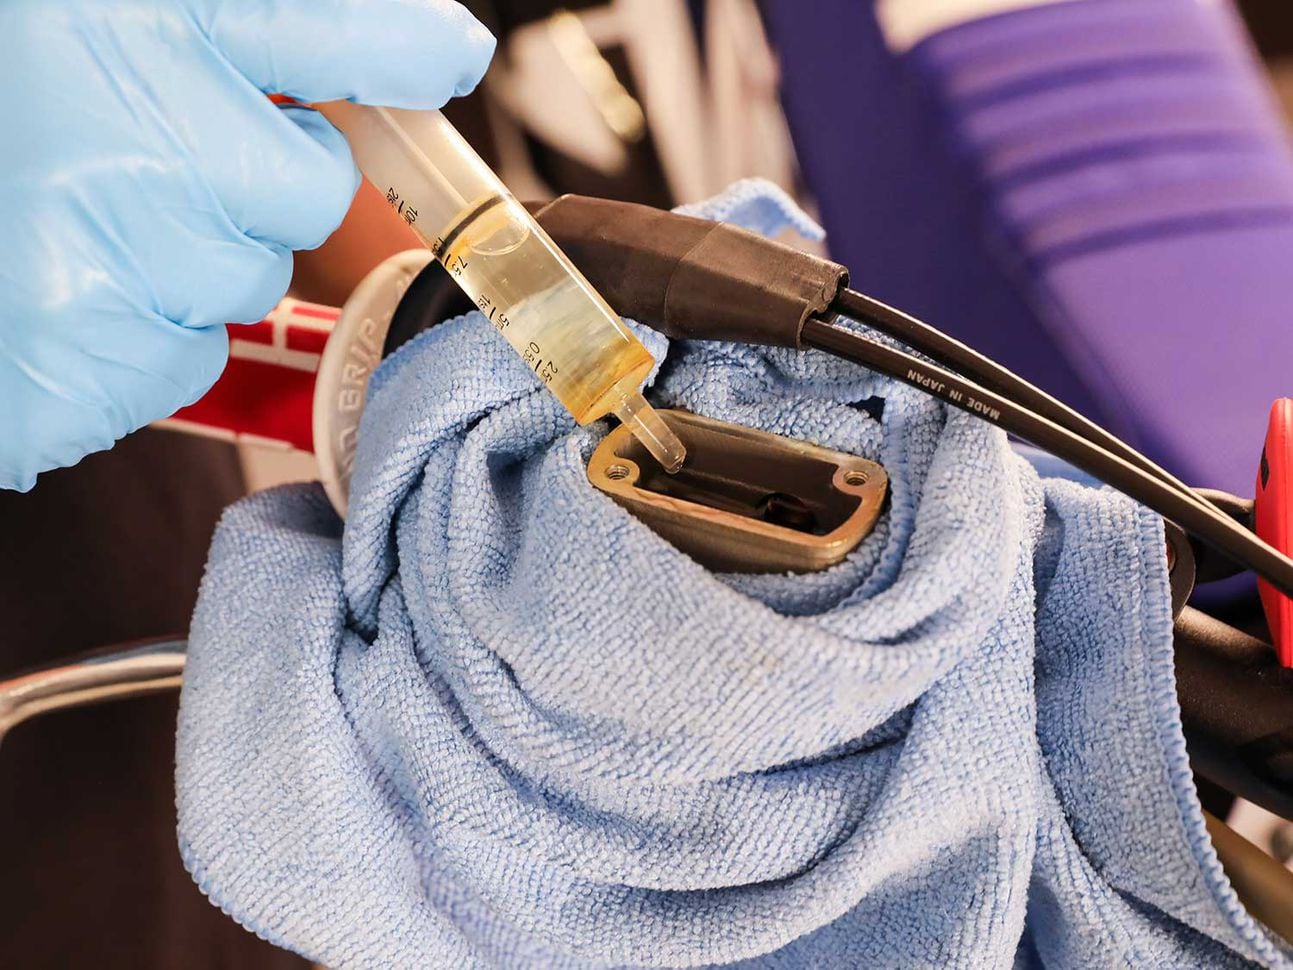 Keep the fluid level in the master cylinder high enough to avoid sucking air throughout the bleeding process. Using a plastic syringe is a great way to avoid spilling fluid when filling.Courtesy of ProX
The bleeding procedure outlined should be repeated until the mixture exiting the bleeder nipple consists entirely of brake fluid. This may take a short or long period of time depending on where and how much air is in the system. Once the brakes have been properly bled, a noticeable improvement in the feel of the brake lever or pedal should be felt when the brakes are actuated.
ADVERTISEMENT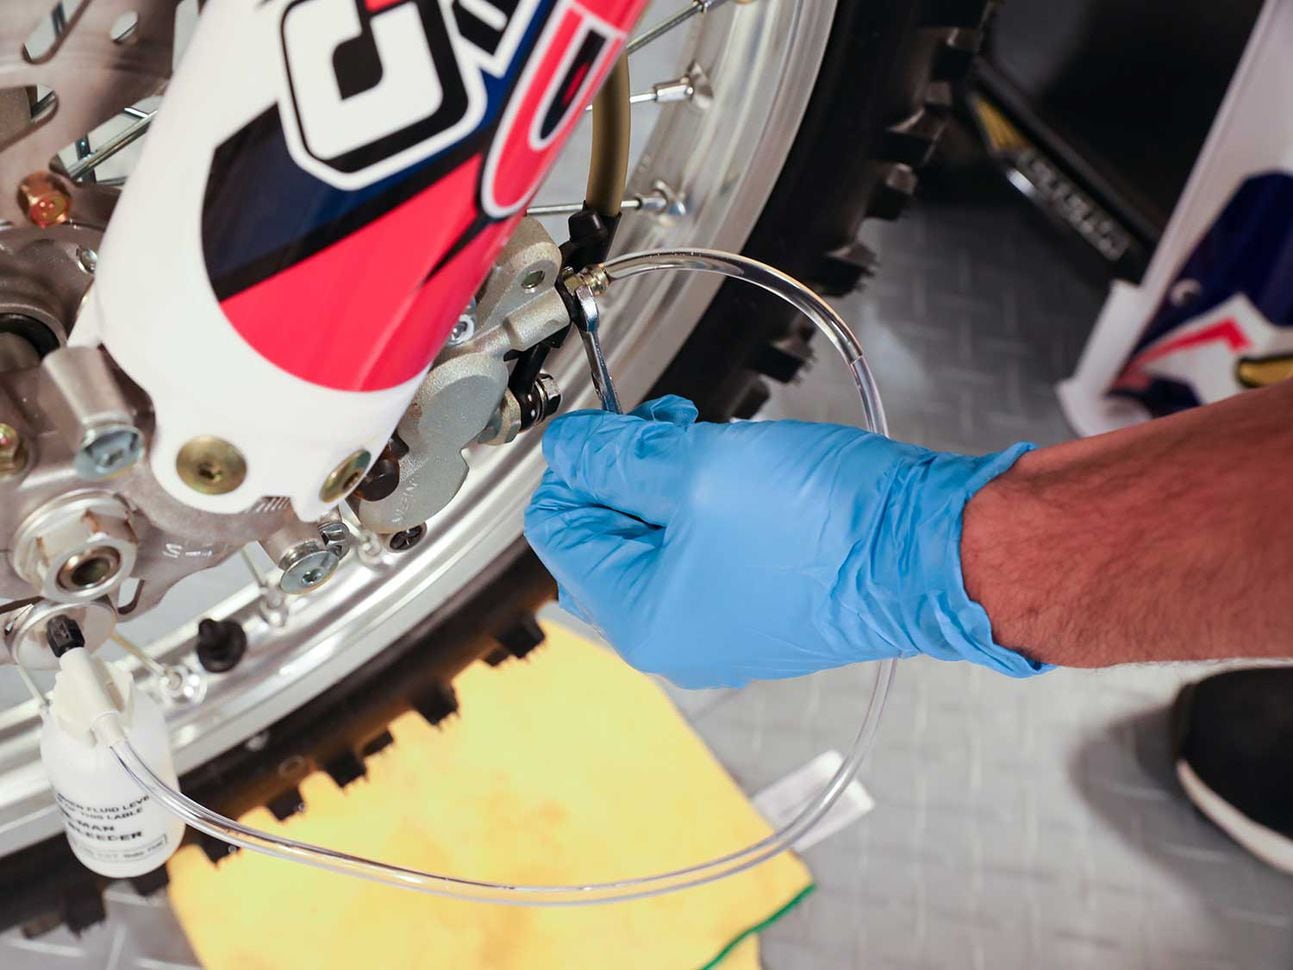 Keep an eye on the clear tubing and bleed until there is nothing but clean brake fluid with no air bubbles exiting the bleed valve.Courtesy of ProX
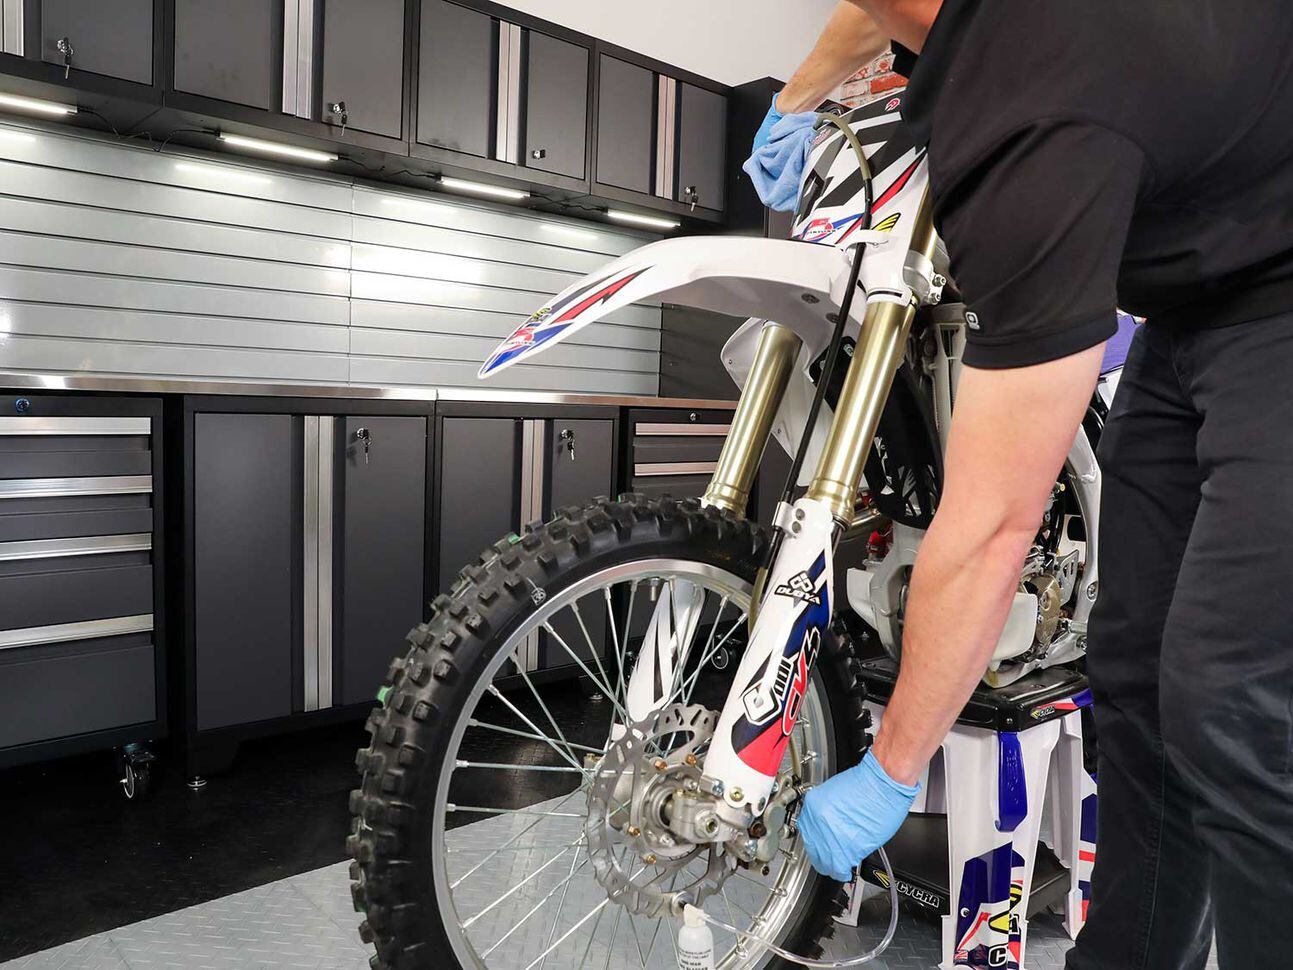
Upon completion of bleeding the brakes, ensure the fluid level in the reservoir is at the upper level of the fill line. Then, carefully install the diaphragm, cover/cap, and any other remaining hardware. Be sure to double-check that the bleeder valve is tight. Once everything has been reassembled, test the brakes one final time by rolling the bike forward and backward, and noting how responsive the brakes are. Assuming everything checks out, it should be test ridden.
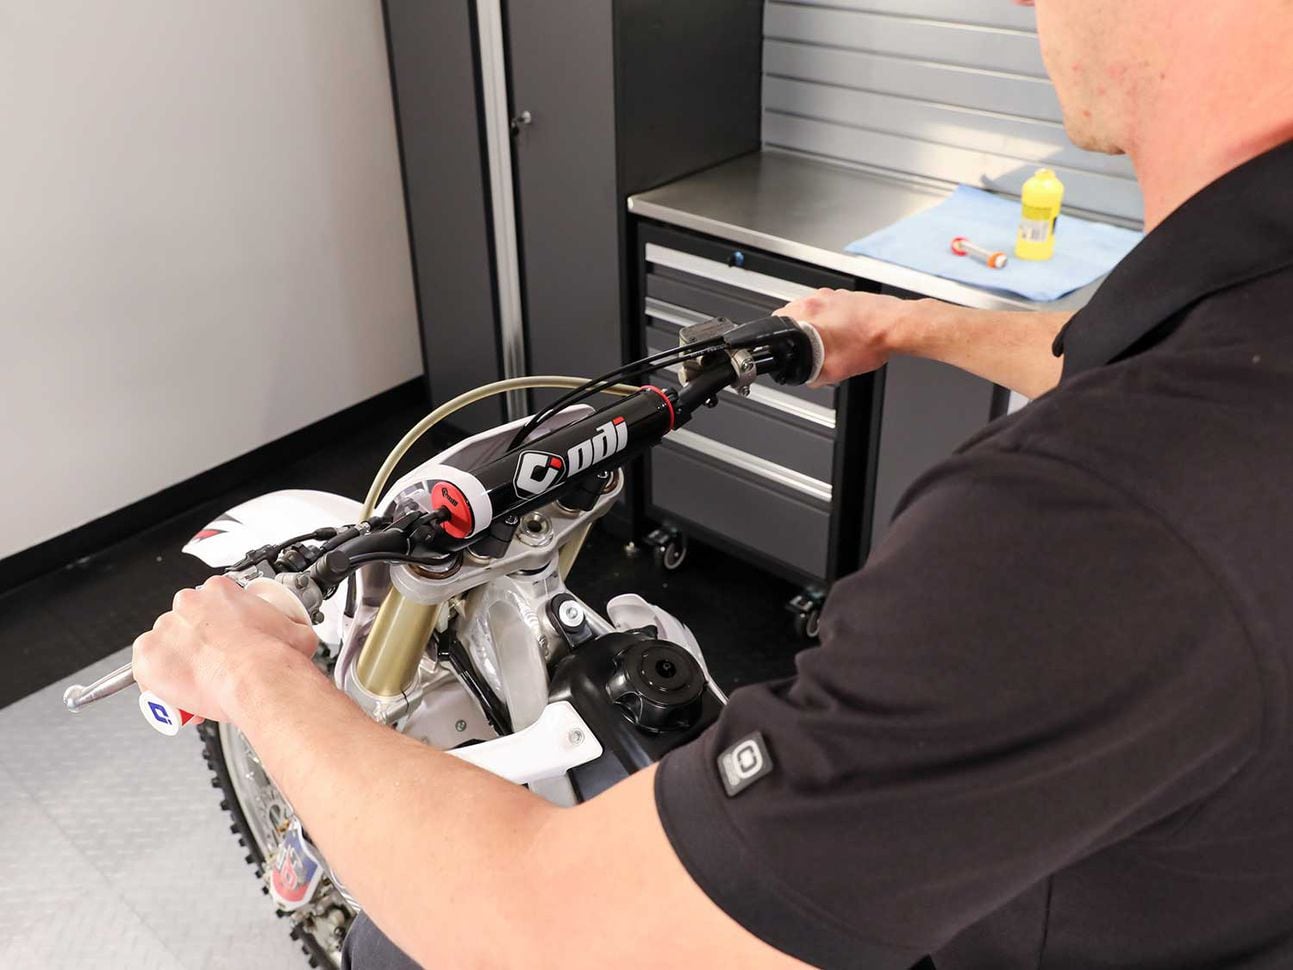 Once everything is put back together and retightened, test the brakes in the garage by just rolling the bike back and forth to make sure they are working properly before riding it.Courtesy of ProX
Perform a test ride by progressively increasing the speed and brake load. Do this based on brake performance and as you gain confidence in the brake system. Always pick a suitable test location and be sure to leave yourself ample room in case something goes amiss. Before performing high-speed and load braking tests, stop the bike and check over the caliper, line, and master cylinder to ensure there are no leaks.
Master Cylinder Tips
If you continue to encounter problems with your brake system after bleeding or find worn-out components in your master cylinder, it’s time to rebuild. Master cylinder rebuild kits make it easy and affordable to get your brakes performing again. The aftermarket is a source for rebuild kits for a job like this. Here’s a few tips to keep in mind during a master cylinder rebuild to ensure your job goes as smoothly as possible.
- Be sure to use a snap ring plier when removing the snap ring from the master cylinder. Attempting to extract the snap ring with anything else often leads to damaging the snap ring groove and surrounding geometry.
- Once the master cylinder has been completely disassembled, be sure to clean the entire master cylinder before reassembly. When cleaning the master cylinder, only use brake fluid.
- Check the master piston and cylinder bore for abnormal scratches. If deep scratches are present, the piston and cylinder should be replaced. Also, reference your service manual for any applicable inspection measurements that should be taken.
- Upon reassembly, be sure to apply new brake fluid to the master piston and master cylinder bore.
- When installing the boot, be sure that it fully seats.
Should you encounter leaks or operational issues with your brake caliper, calipers can also be rebuilt and resealed.
-
-
Quick search shows grainger has several and they are not that expensive.
-
-
-
-
34 minutes ago, Bp619 said:Nice pics will be back on big bike in couple weeks ready for some Otay sunset's
Same here. I am working on some issues with the 990. It is the perfect bike for me to ride down to Otay sunsets.
-
Yes South. You will see at the parking lot on the left as you are driving down Pamo rd. It is located at the Orosco Ridge trail head.
-
There is a parking lot on Pamo rd that is about a mile from the trail head.
-
Looks to me he was trying to keep the front end off the ground and happened to land it in the mud hole and it could not get out.
-
-
I received a text from him today. He is at work and ok.
-
-
Sorry to hear this as well. I did not know him that well, but did do trail maintenance with him at Coral Canyon. I also went to his shop a couple times and checked out his fabrication and discussed off road trailers. He was very committed to off road and was a very talented fabricator. RIP MetalTwister!
-
-
Love the fact that this tool is being utilized. Please keep the write ups from the rides in the actual write up forum. Glad you had a nice ride Mimi.
-
 1
1
-
-

When to Initiate a Backcountry Rescue (with Your Garmin InReach, PLB, or SPOT)
In This Guide - What’s the best SOS device to get?
- When is it okay to hit SOS?
- How does the rescue work?
- What you can do to increase your chance of survival.
The popularity of satellite communicators like InReach, PLBs, and SPOT has opened up a never-before realized lifeline from the backcountry to the outside world. For most of us who use these devices, this means sending a text message or track log to a loved one to let them know that we’re okay. But what happens when you get in trouble? How do you know what it’s okay to hit the SOS button? How “in trouble” is “in trouble,” and when is it enough to warrant an SOS?
As someone who reviews InReach devices, It’s a question I get asked often. Questions I get include:
- What if I sprain my ankle?
- What if I get lost but can survive for a night or two?
- What if I see a forest fire?
- What if I see someone else hurt?
And they’re all great questions.
So I sat down with Director of Technology for SAR / Los Angeles County Sheriff, Steve Goldsworthy. Steve has over 30 years of experience with LASD and was kind enough to share some practical insights on when to hit that SOS button. I’ve also added my thoughts from interviewing hikers who hit the SOS button, and my experience from pressing the SOS button myself to aid other hikers.
 A big thanks to Steve Goldsworthy and the Los Angeles County Sheriff’s department, who carved out time from a busy schedule to talk backcountry rescue and address your questions.
And just a note, the guidelines in this article are in no way an official policy of the Los Angeles County Sheriff’s Department. The recommendations here are my own based on their generous input and insight, my experience, and the experiences of other hikers.
Let’s Talk SOS Devices First
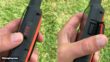
 Today’s hikers are lucky; backcountry SOS devices are reliable, easy to get, and only cost a few hundred bucks. Your life is worth it, so please get one.
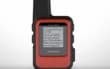
There are a few flavors of SOS devices that most people have in the backcountry: a PLB (like the ACR), a SPOT satellite communicator, a satellite phone, or an InReach satellite communicator. Each flavor has a different way of communicating with first responders.
- A PLB will use government emergency channels to initiate a rescue (check out this article on the ACR ResQLink View for all the details). A PLB is a one-way street; you hit SOS and wait. There is no communication back to you.
- InReach and SPOT devices use a private company called GEOS to initiate and coordinate a rescue. With all InReach and some SPOT devices, you have two-way communications with GEOS, family, friends, and first responders.
- Some satellite phones also have GEOS SOS service integrated. Otherwise, you would call emergency services on your own with the phone.
The Two-Way Advantage
 Having a two-way communicator like the InReach Mini allows you to chat with rescuers once you initiate an SOS.
If you have an InReach or two-way satellite communicator that uses GEOS, you have some distinct advantages over a one-way distress call.
- GEOS will have a two-way discussion (via text) about your situation and will advise in real-time.
- GEOS can allow you to communicate with medical professionals.
- GEOS will enable you to communicate with first-responders.
- GEOS will keep your emergency contacts apprised of the situation as it happens.
- GEOS will stay in communication with you until you end the distress call.
The downside is that you have to pay for this service as a subscription. I don’t mind paying a few bucks for a service that increases my chances of surviving. If you don’t want to pay for a subscription, your other option is to get a PLB like the ACR ResQlink.
You can check out my guides and reviews of the InReach devices: InReach Mini, InReach Explorer, and GPSMAP 66i.
What if I only have a cell phone? Well, it’s not nearly as good as a satellite communicator for backcountry SOS, but there might still be a chance to communicate with search and rescue. I’ll talk about your options later in this article.
When to hit the SOS button
 Rescue is only a button press away, but when do you really need it?
Let’s get to it. When should you hit the SOS button? Steve Goldsworthy of LASD SAR has a great answer to that question.
Hit the SOS button in the backcountry when you are in doubt about your outcome.
You won’t ever get in trouble for hitting the SOS button if your request for help is genuine. That guidance is flexible enough to account for your experience (or inexperience) level.
And if it further helps your decision-making process, hit SOS when you think you are in danger of life or (loosing a) limb. That’s a piece of advice I received in a NOLS class, and it can help clarify “outcome,” especially if you are a more experienced hiker.
I would add that having a two-way communicator like an Inreach device will increase your options and make your evacuation potentially easier for all parties.
New Guide Notifications
Quarterly Newsletter - Instagram - YouTube - FacebookSOS Scenarios
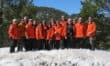
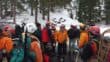 Make sure you are responsible when hitting the SOS button. Most search and rescue teams, like the Montrose Search and Rescue Team seen here, are all volunteers. When you hit the SOS button, you potentially put all of their lives at risk. Photo Montrose Search and Rescue Team
Let’s walk through some potential SOS scenarios based on your questions and the criteria we just outlined. And here comes another disclaimer. There are no absolutes, and these are all hypothetical judgment calls to illustrate the SOS criteria in action. All emergencies are different. There are many variables for every situation. Only you can make the final decision on whether to hit the SOS button or not.
-
You are 5 miles away from the trailhead, and you sprain your ankle. You can’t walk without a lot of pain. You’re not sure if you’ll make it back before nightfall or at all. You have a daypack but have never stayed overnight in the woods.
- Hit the SOS button.
-
You are 5 miles away from the trailhead, and you sprain your ankle. You can’t walk without a lot of pain. You know that you can make it to the trailhead by going slowly, and if it gets dark out, you have a headlamp with extra batteries.
- Hike out without an SOS. If you have an InReach, let family or friends know about the situation.
-
It’s getting late, and you took what you thought was a shortcut, and now you’re stuck on a cliff. You might be able to climb down if you tie your shirt and jacket together to make a rope.
- Hit the SOS button.
-
You are 2 miles into the hike, and you get severe leg cramps. You can’t walk or move.
- The immediate outcome of a leg cramp is just some pain. You know that cramps come and go. Wait and see if your condition gets better. Try to walk back to the trailhead. If you can’t move, hit SOS. If you have an InReach, ask GEOS about treating your condition.
-
You alone, you slip, fall and hit your head hard. You feel dizzy, but think you’ll be okay.
- Hit the SOS button.
-
You are lost, and it’s getting dark out. You’ve tried to retrace your steps, but nothing looks familiar. You’ve called out for help and haven’t heard anyone else. You don’t have the gear or experience to spend the night in the backcountry.
- Hit the SOS button
-
You are lost, and it’s getting dark out. You’ve tried to retrace your steps, but nothing looks familiar. You’ve prepared with maps and gear to spend the night.
- If you have an InReach, let your family know you are okay, but lost, and are spending the night. Rest and use your maps and navigation tools to evacuate in the morning. If you still can’t find your way out or get stuck, hit SOS.
-
You’re out with a hiking group, and you’ve lost sight of the leading group of hikers. It’s getting dark; you have no idea where you are, and you’re not prepared to stay overnight.
- Hit the SOS button
-
You’re an experienced hiker and get caught high in the mountains during a blizzard with lightning. It’s colder than you expected, visibility is zero, lightning is crashing around you, and you don’t know which way to go.
- Hit the SOS button
-
You are hiking over a stream, slip, fall, and are shivering uncontrollably. You can’t stay warm, and you have several hours to hike out.
- Hit the SOS button.
-
You’ve hiked down the Grand Canyon, and now you’re hiking back up and out. It’s harder than you expected, but you know where you are and where the trail goes. But you’re exhausted. You only have a few hours of daylight left.
- Keep hiking back out. You know the outcome is that you will be exhausted but safe. If it gets dark out and you don’t think you can make it through the night, hit the SOS button. If you exert yourself so much that you think you have a medical emergency such as heat stroke, hit SOS.
-
You see a massive plume of smoke a few miles in the distance. It looks like a wildfire. You are a few miles from a road or trailhead.
- Hit the SOS button. If you have an InReach, communicate with the GEOS team about the situation and evacuation routes.
What Happens When I Hit SOS?
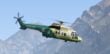 If conditions permit, you may be recused quickly by an aircraft like Los Angeles County Sheriff’s Helicopter, Air Rescue 5. Otherwise, a rescue could take many hours or days.
The process varies slightly depending on your situation, device, and location, but the basic workflow is
- Someone monitoring the SOS channels (GEOS, the Air Force, etc.) gets a distress call. Generally, the distress signal will also include GPS coordinates.
- They will look up any information associated with the beacon, such as your name, age, experience, etc.
- They will reach out to state emergency officials.
- State officials will determine the appropriate county officials and contact them.
-
County officials will determine the appropriate first responder team(s).
- Weather-permitting, this could be a helicopter.
- If the conditions don’t allow for a helicopter, it will likely be a search and rescue (SAR) ground team.
- A SAR ground team could also come in to support a helicopter.
- The SAR team will contact the agency that received the SOS call (such as GEOS) to get all the information they can, including your GPS position.
- The SAR team will try to communicate with you if you have a two-way communications device.
- They might use software such as SARTopo to plan an approach to your position based on the conditions and their local knowledge.
- Aviation units can potentially reach you quickly, but may not be able to evacuate you based on the conditions.
- Ground teams will probably take a bit longer to reach you than it took for you to get where you are.
- If you have a two-way communicator like an InReach, GEOS will check in with you periodically and update you on the situation.
- Maybe a helicopter will swoop in and airlift you away to safety if the conditions permit. If the conditions are bad, a rescue could take days. Most ground rescues take at least several hours.
FYI, in Los Angeles, all SAR team members are certified EMTs.
Here’s a video on how the process works with an InReach device.
And this video shows the Montrose Search and Rescue Team in action. It’s not hiking specific but still interesting in terms of rescue workflow.
And here’s what it’s like to be rescued from a cliff from a helicopter.
And lastly, here’s a rescue where it took 5 days to find the missing hikers. If the hikers had been carrying a PLB or satellite communicator, the rescue would likely have been a matter of hours.
What to Do After You Hit SOS
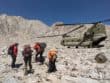 Once you hit the distress button, it’s important to stay where you are so that search teams can move into your position. In this photo a team from Inyo County Search and Rescue gets ready to search for a hiker who tried to take the challenging Mountaineers Route up Mt Whitney. The team has been inserted into the area by a California National Guard helicopter, which would also evacuate the hiker when she was found. Photo courtesy Inyo County Search and Rescue
The most important thing is to stay put wherever you triggered your distress call.
First responders will travel to the distress call’s GPS position. If you move, they then have to try and find you.
Other things you should do are:
- Get comfortable and settle in. A rescue will likely take at least a few hours, if not longer.
- Put your phone in airplane mode to save battery if you haven’t done that already. Don’t use the flashlight on your phone; it drains the battery quickly.
- Update GEOS if your situation or condition changes.
- If you see or hear a helicopter, use your cellphone camera with a flash to signal them. You can also flash your headlamp or turn on its strobe feature.
- When you hear the SAR team approaching, yell to let them know where you are.
How to Increase Your Chances Of Rescue Before Leave Your House
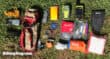 I always carry some form of an emergency kit with me when I hike. It doesn’t have to be heavy or complicated, but it will dramatically increase my chances of survival and comfort level if something goes wrong.
There are some simple steps you can take before your hike to increase your chances of survival.
- Tell friends or family where you are hiking and when you will be back. Tell them if “I’m not back by Xpm” to call 911.
- Email or text them a link to the trail or trail guide you are using.
- If you are not back, they can call 911 and report you as overdue. You don’t have to wait 24/48/whatever hours to report someone missing. And you don’t have to file a missing person report to activate a SAR team.
- When you hike, don’t just follow a line on a GPS unit. Look at maps, know the route, and know where you can potentially cut your hike short if you need to (like an alternate trail or road).
- Hike with friends. Ideally, you’ll all be at similar fitness levels and can do the hike together. If you think the group will break up, then don’t hike as a group.
- Check the weather and conditions on your hike before you go. Err on the side of caution, especially if you are attempting a challenging hike.
- Search for current online trip reports that cover your hike to get updated conditions.
- Use a website like Mountain-Forecast.com to get predicted conditions at altitude.
- Call the ranger station and ask about the condition of the route. (I have the phone number in all of my hike guides)
- Understand that an easy trail in the summer can be treacherous in winter conditions,
- Know the hiking essentials and bring them with you on your hike.
- If I’m hiking in the backcountry, I bring a lightweight overnight kit that lets me camp in a pinch. Once a year, I do a practice overnight with my kit.
- Make sure that your phone is fully charged and put it into airplane mode to save battery.
- Pair your phone with your InReach but turn Bluetooth off on your InReach to save battery. If you have to have a two-way conversation with GEOS over InReach text, pair your phone. It’s much easier to type on your phone than on the InReach unit.
- Fully charge your InReach and make sure that your plan is active.
- If you’re not going to bring all the essentials, at least make sure you have a headlamp or flashlight in case you get caught out after dark.
- Take a wilderness medicine course.
Want some gear recommendations? Check out my gear page. Only hiking gear that I use, no paid BS.
What If I Don’t Have a Satellite Communicator?
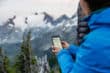 It’s hard to beat a smartphone that can offer precision mapping and a great camera in your pocket. But it’s not built for the backcountry; screens can break, and batteries can die. And of course, you may not have a cell signal miles away from civilization. So my advice is to get a satellite communicator. But if you only have a phone, there are some things you can do that help with a rescue. Photo GaiaGPS
If you find yourself in distress without a cellphone signal in the backcountry, there are some steps you can take that will assist SAR teams.
- Dial 911. Even if you don’t have coverage from your carrier, there might be other carriers in the area with reception, and the 911 request will be routed through them. The cell tower can give rescuers a distance and general directional sector to perform the search in.
-
Put your phone in airplane mode and turn on WiFi. Some rescue teams are using Airflare units, which can sniff out your phone based on your WiFi.
 This little Airflare unit allows rescuers to sniff out your phone using information from your home or work WiFi network.
- If you can safely start a small, contained fire, do it. Some rescue teams have thermal imaging cameras that can see the heat signature from the fire or camp stove. Use this method with caution, and only if you know you can contain the fire at all times. One of the largest forest fires in California history, the Cedar Fire, was ignited by a novice hunter who started a small fire to signal a rescue. Be sure to clear an area ten feet around your small fire to keep it contained. If it’s windy out, don’t start the fire.
- Make noise, wave bright-colored clothing, flash mirrors or glass, and do whatever else you can to signal aircraft or first responders when you hear them coming close.
Who Pays For My Rescue?
In California, you pay nothing for a rescue. In Los Angeles County (and many others), volunteers perform the rescue in conjunction with the Sheriff’s Department. If you want clarification about who would pay for a potential rescue, give your local sheriff’s department a call.
However, you might have to pay for an ambulance or emergency service when the rescue ends. If a SAR team transports you from the trail to the road and a private ambulance service picks you up, you (or your insurance) may be liable for the ambulance transport costs.
If you’re not critically injured, you have the option of not getting professional care and simply driving home or to your doctor.
If you are hiking in an area without free SAR services, InReach offers affordable rescue insurance that you can buy through the online InReach control panel.
What To Do If You See Someone In Need
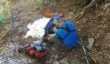 If you see another hiker injured, is it okay to hit SOS on your device for them? Photo and search and rescue story from Jay Johnson.
I’ve used my InReach for emergencies, but they weren’t my own. If you hike enough, at some point, you’ll encounter others in need. The great thing about having a satellite communicator is that you can use it to get help for someone else. Ideally, you have an InReach where you can relay the specifics of the situation to GEOS.
Now I’m not a lawyer, and there’s probably angles here where you could potentially get sued for helping someone and also for not helping someone (duty to rescue). So don’t take this as legal advice. I’m just sharing based on my experience.
I’ve hit SOS on my Inreach twice to assist other people. Both times it was because of altitude-related sickness. In both cases, I messaged GEOS during the beginning of the SOS call and told them that it was for another person. There wasn’t a problem with this, and I simply waited with the people in distress until a SAR unit arrived. Then I canceled the SOS on my InReach and moved on.
Note that if you have rescue insurance, it only covers you, not anyone else in your party, or strangers you may assist on the trail.
Help Those That Help
 It’s easy to say thanks to the volunteers who are there for us 24/7/365. Here’s the Montrose Search and Rescue Team, made up of dedicated volunteers from the local community.
Most search and rescue operations are nonprofits run by volunteers. And while they get some assistance from local government organizations and grants, they still rely on the public’s aid for funding. Los Angeles County Sheriff’s Department Search and Rescue Team members are Reserve Sheriff’s deputies who volunteer their time to help others for $1 a year, and who partner with sheriff’s civilian volunteers who volunteer for free.
These men and women volunteer their time and risk their lives to save others, please give back and say thanks. Here’s how you can give back to SAR teams in Los Angeles County:
- Montrose Search and Rescue Team
- Altadena Mountain Rescue Team
- Sierra Madre Search and Rescue Team
- Antelope Valley Search and Rescue
- Malibu Search and Rescue Team
- Santa Clarita Valley Search and Rescue Team
- San Dimas Mountain Rescue Team
- Avalon Search and Rescue Team
If you’d like to donate to a SAR team near you, just Google it or call your local police department.
Putting It All Together
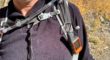 It only takes some simple steps to dramatically improve your chances of surviving in the backcountry. Here I am with a small InReach device, worth every ounce and penny in my book.
- Carry a satellite communicator like the InReach.
- Prepare for your hike responsibly.
- Hit the SOS button in the backcountry when you are in doubt about your outcome.
- Wait for rescuers in the same place that you hit SOS.
- Help others in need with your device.
- Help SAR teams by donating.
A big thanks to the Los Angeles Sheriff’s Department for helping me with this article. Specifically, I’d like to thank Deputy Morgan Arteaga for setting this all up, and Steve Goldsworthy, Director of Technology for SAR / Los Angeles County Sheriff, for taking the time to answer my questions and talk about SAR with me.
-
Please post in the actual "Write Up" thread. Thank you
-
-
-
1 hour ago, KTMrad said:Bummer, I have to bail on this ride.
Went to eye doctor today...not the news I wanted, but knew I have a problem in one eye.
That's not good. I hope it gets better.


Large Brush fire breaks out in Alpine
in Emergency - Evacuation Information / Help
Posted
https://www.sandiegouniontribune.com/news/public-safety/story/2020-09-05/small-brush-fire-reported-near-alpine