Jump to content
Sign in to follow this  
Krs1

Changed and bled brakes now rear is kinda soft (dr 350)

Recommended Posts

Hello all I recently purchased a 1990 dr 350s dual sport. I have slowly been doing general matinence and just did the brakes. New pads front and rear as well as new fluid in both master cylinders. Totally bled brakes with clear fluid, my problem is rear brakes seem kinda soft, the lever goes further than it did before with less stopping power. Front lever pulls a little more than before but stops just fine. Am I missing something? If possible do I just need to adjust the levers? If so how do I do so. Thanks in advance from an oside noob

Share this post


Link to post
Share on other sites

I bleed with this tool supersucker5000 .. presdesessor to the supersucker 3000 which is air powered .

Patent pending...

post-15687-0-79262900-1413338395_thumb.j

Share this post


Link to post
Share on other sites

You still may have a air bubble pulsing back and forth. Rapidy slap the lever with the res cover off and you may see tiny bubbles working their way up.

Share this post


Link to post
Share on other sites

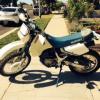
Ya I wish it was mine.. its just here for clutch cable, shift shaft seal, and an oilchange..

Oh ya drilled holes to mount baja design blinkers in the rack.

Check out his picninc basket mounted on the back. Holds two helmets just incase he picks up a new girlfriend on the way thru town.

$10 bucks home depot...

Share this post


Link to post
Share on other sites

Will do kinda hard to bleed the brakes solo lol so your saying tap the levers without the bleeder screw? Can I adjust the levers? Btw how do I post a pic via iPhone?

Share this post


Link to post
Share on other sites

just a ? did u hold down the brake lever when u opened the bleeder screw.Aslo what kind of fluid.make shure it was not old.old brake fluid will get water in it real quick even if the top is put back on.

Share this post


Link to post
Share on other sites

You still may have a air bubble pulsing back and forth. Rapidy slap the lever with the res cover off and you may see tiny bubbles working their way up.

If you got the brakes bled and every thing tite then slap the lever. I have never used a bleader tool in my life. And I am almost 60 :smile_anim: . Somehow I got a knak to do it with out a tool. But every bike may be different. If you still have problems let us know.

Share this post


Link to post
Share on other sites

Yes held both front and back levers after pumping. Opens screw and once the lever depressed I closed the screw then repeated till new fluid came out of screw then topped master cylinder off to specs and sealed it. Would this not be a lever adjustment? It is 25 years old but in great condition!!!

Share this post


Link to post
Share on other sites

Yes held both front and back levers after pumping. Opens screw and once the lever depressed I closed the screw then repeated till new fluid came out of screw

to make it easier and be sure no air gets back in use a small hose (transparent so you can see the fluid and make sure no air comes back up through the bleed screw) and a catch can. or maybe you already did that?? looks like 350thumper's super tool but I'm not sure why he has two hoses in his (maybe a vent ahah). Only use one hose so you don't infringe his patent.

Anyway staying on topic. 1: connect the hose to the bleed screw, 2: crack the bleed screw open, and 3: slowly ad fluid as you pump pedal/lever making sure the master cylinder stays topped of at all times so no air gets sucked in obviously. I bet you will end up seeing bubble coming out of the bleed screw inside the transparent hose eventually. 4: when new fluid comes out and bubble free just tight the bleed screw and only THEN remove the transparent hose.

Hope I make any sense man

Share this post


Link to post
Share on other sites

I bleed mine as mentioned already but have also read where folks with "mystery air bubbles" or just plain stubborn ones zip tie the lever in a pulled position, take the cap off of the res but set it on top (keeps contaminants out but allows air to escape). Leave it overnight and the air bubble works it's way up and out.

There's a reason the hydraulic techs in the Navy are called "bubble chasers."

Share this post


Link to post
Share on other sites

Never knew that about the navy lol. Well I use a clear tube but pump, hold, open bleed and close then release handle. Kato it does make sense, should I just pump with it wide open than pump till pressure bleed till no pressure that repeat? I've never used just pump with it open on any vehicle cuz no pressure builds. Maybe I'm doing it wrong lol.

Share this post


Link to post
Share on other sites

yea try leaving it a bit open as you pump (about 1/2 turn is enough), you don't need much pressure all you need is to circulate the fluid and push bubbles out by pumping/tapping on the pedal/lever. keep an eye on the clear tube as you pump as to not suck air back in (same with the master cylinder).

pressure will come as you get that bleed screw tight again.

"bubble chasers."

shock-rebuild-79_zpsfd0a43c9.jpg

Share this post


Link to post
Share on other sites

Yep I work tomorrow not home till sat or Sunday so will give this method a go first thing. I will report with results. Just curious can u adjust lever/pedal to stop with less pull/push of the lever/ pedal?

Share this post


Link to post
Share on other sites

I was thinking landing gear, flight controls, etc but that'll work Kato. :)

our friend Suspenders came to mind when I read "bubble chaser" ahah he put so much love at chasing air out of my shock you know.

sorry for the hijak Krs

Share this post


Link to post
Share on other sites

Lol no worries kato I'm gonna get to the shocks next and something as simple as brakes I can only imagine the front shock being a pain in the ass! Off to work will update sat or sun morn

Share this post


Link to post
Share on other sites

Naval aviation hydraulic systems are less of a PITA than brakes with issues like this.

There is an adjustment for the pedal, the push rod that attaches the master cylinder to the pedal has a threaded adjuster.

Also, if all else fails I have a complete rear brake system for DR350.

Share this post


Link to post
Share on other sites

Sweet tntmo good looking out!!! I'm itching to get home to solve the problem. Thanks for all the info men!!!

Share this post


Link to post
Share on other sites

I bleed with this tool supersucker5000 .. presdesessor to the supersucker 3000 which is air powered .

Patent pending...

Its actual a SUPPERSUCKER-500 (0,5Liter)

Share this post


Link to post
Share on other sites

Ok here's an update! I just got home from work 4 days later? and re bled my brakes. Had the wife pump as I bleed. Front brakes done! Super tight and sensitive!! Back brakes went through 5 master cylinders of fluid and still not very sensitive they brake but really have to stomp to even get the back tire to skid. I believe I got all the air out so would this be a pedal adjustment, air still in the line or is the rear brake supposed to this soft? I know my front brake should be 75% of braking but dosent seem like rear is even giving me 25%. Sorry for the long progress update wait

Share this post


Link to post
Share on other sites

One time I put sintered metal pads in my XR400 and it did not stop. I took them out and instaled oem pads and it started to work good.

Share this post


Link to post
Share on other sites

If you crack open the bolt at the master (elbow)...ever so slightly while its under some pressure the trapped air will escape. Youll be able to here it . Then tighten the bolt back up. Repeat until only fluid shoots out ..also make sure the bubble can float up ward ,( like kug said )

The rear brakeline is usually kinda horizontal so the bubble gets stuck half way down the line ... a good ride up some rough terrain normally clears that up because the bubble gets unstuck from all the rough and tumble..

Share this post


Link to post
Share on other sites

Create an account or sign in to comment

You need to be a member in order to leave a comment

Create an account

Sign up for a new account in our community. It's easy!

Register a new account

Sign in

Already have an account? Sign in here.

Sign In Now
Sign in to follow this  

×

Important Information